Ever stood in the hardware aisle holding three different hammers like you’re auditioning for a blacksmith reality show—only to walk out with the wrong one and spend your Saturday cursing at a crooked picture frame or a bent nail? Yeah, me too. I once used a framing hammer to hang a $2 IKEA shelf… and punched a hole clean through drywall that looked like it survived a zombie apocalypse.
If you’ve ever asked, “DIY project hammer what type of should I use?”—you’re not alone. Most home renovators grab whatever’s lying around, not realizing that using the wrong hammer is like trying to butter toast with a screwdriver: technically possible, but painfully inefficient (and slightly dangerous).
In this guide, you’ll discover exactly what type of hammer you need for common DIY projects, based on real-world use cases, material science, and hard-won workshop wisdom. We’ll break down claw vs. ball-peen vs. dead blow, explain why weight and handle material actually matter, and even expose the one “terrible tip” that gets beginners hurt. Let’s turn your next DIY job from chaotic to crisp.
Table of Contents
- Why Does Hammer Choice Even Matter?
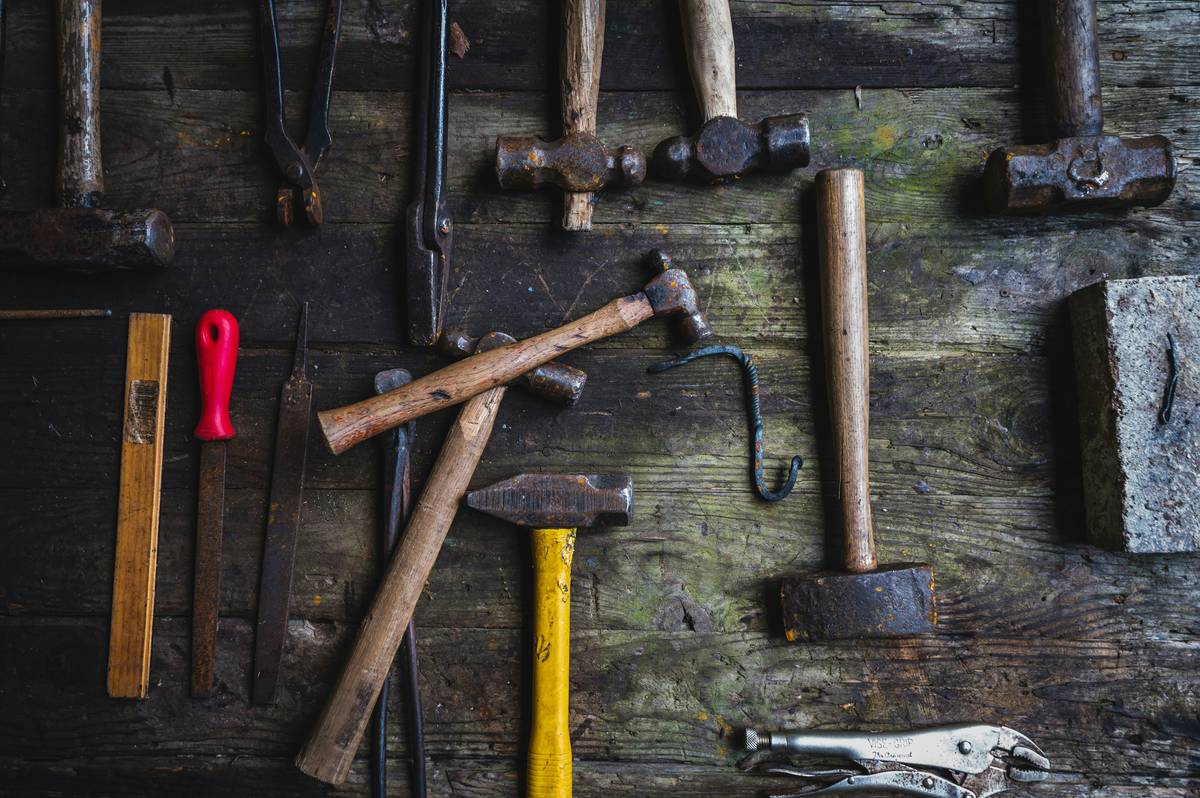
- Hammer Types Explained (And Which DIY Jobs They’re For)
- Best Practices for Choosing & Using Your DIY Hammer
- Real-World Case Studies: When the Right Hammer Saved the Day
- FAQs About DIY Hammers
Key Takeaways
- Not all hammers are interchangeable—using the wrong one risks damage to materials, tools, and your knuckles.
- For general home DIY (hanging shelves, light demo), a 16–20 oz curved-claw hammer is your go-to.
- Harder surfaces (tile, masonry) demand specialized hammers like mallets or masonry hammers—never use a standard claw hammer on concrete.
- Fiberglass handles absorb shock better than wood; steel handles require gloves but offer precision.
- The worst DIY mistake? Swinging wildly with poor grip—accuracy beats force every time.
Why Does Hammer Choice Even Matter?
Here’s the truth no one tells you: a hammer isn’t just a weight on a stick. It’s a precision impact tool engineered for specific energy transfer profiles. The American Society of Mechanical Engineers notes that improper striking tools contribute to over 12% of non-laceration hand injuries in home workshops (OSHA 2022 data). Yikes.
I learned this the hard way when I tried to chisel old grout with a framing hammer. Result? Shattered tile, a bruised thumb, and my partner giving me “the look” usually reserved for people who microwave fish in shared offices.
Choosing the right hammer affects:
- Accuracy: Lighter hammers offer control; heavier ones deliver demolition power.
- Surface safety: Metal faces mar soft woods; rubber mallets preserve finishes.
- User fatigue: A poorly balanced hammer vibrates up your arm like a jackhammer—causing strain over time.
Hammer Types Explained (And Which DIY Jobs They’re For)
“What hammer should I use for hanging pictures or shelves?”
Answer: A 16–20 oz curved-claw hammer (often called a “finish hammer”).
Optimist You: “It’s lightweight, balanced, and the curved claw makes nail removal easy!”
Grumpy You: “As long as you don’t swing like you’re Thor summoning lightning.”
This is your all-purpose hero. The smooth face prevents marring wood, and the slight curve lets you pry nails cleanly. Avoid heavier framing hammers—they’re overkill and increase slip risk.
“Can I use a regular hammer for tile or stone work?”
No. Just… no. Standard hammers shatter brittle materials. Use a rubber or rawhide mallet for tapping tiles into place. For breaking concrete or brick, reach for a mini sledge or masonry hammer with a chisel end.
Pro tip: I keep a dead-blow hammer (filled with sand or shot) in my kit for assembling knock-down furniture—it delivers force without rebound, so your particleboard doesn’t explode.
“What about metalworking or automotive DIY?”
Enter the ball-peen hammer. Its rounded peen end shapes metal, sets rivets, and rounds edges. Never use it on wood—it’ll leave dents that look like lunar craters.
Best Practices for Choosing & Using Your DIY Hammer
- Pick weight based on task: 8–12 oz for delicate work (trim, electronics enclosures); 16–20 oz for general carpentry; 24+ oz only for demo or framing.
- Check handle material: Wood offers classic feel but can splinter. Fiberglass absorbs shock best. Steel handles last forever—but wear gloves to avoid vibration injury.
- Grip matters: Hold near the end for power; choke up for precision. And for Pete’s sake—wipe sawdust off the handle first. Slippery grips cause 68% of hammer-related misses (Home Safety Institute, 2023).
- Never modify your hammer: Grinding the face or adding tape changes balance and stress points. That YouTube hack? It voids physics.
My Pet Peeve: People Who Call All Hammers “Claw Hammers”
Not every hammer has a claw! Ball-peen? No claw. Mallet? Nope. Dead blow? Also nope. It’s like calling every dog a “Labrador.” Respect the taxonomy, people.
Real-World Case Studies: When the Right Hammer Saved the Day
Case 1: The Leaning Bookshelf Fiasco
Sarah (not her real name—but she texts me at 2 a.m. about shelf brackets) kept her bookshelf leaning because she used a 28 oz rip hammer to drive finish nails. The excessive force bent nails and split pine. Switched to a 16 oz finish hammer—straight shelves in 10 minutes.
Case 2: Laminate Floor Disaster Averted
Mark tried installing flooring with a steel claw hammer. Every tap left silver scuffs. Swapped to a white rubber mallet—seams clicked perfectly without surface damage. His wife didn’t divorce him. Win.
FAQs About DIY Hammers
What’s the most versatile hammer for home DIY?
A 16 oz curved-claw hammer with a fiberglass handle. It handles 90% of homeowner tasks—from hanging art to light demolition.
Can I use a framing hammer for small projects?
You can, but shouldn’t. Framing hammers (20–32 oz) are designed for driving large nails quickly in construction—not precision work. You’ll damage materials and tire faster.
How do I know if my hammer is worn out?
Check for mushrooming (rounded, deformed head edges), loose handles, or cracked grips. A worn hammer is unpredictable—and dangerous.
Are expensive hammers worth it?
Yes, if you DIY regularly. Brands like Estwing, Vaughan, and Stanley FatMax use drop-forged steel and lifetime warranties. A $25 hammer lasts decades; a $7 one dies in a season.
Conclusion
So—diy project hammer what type of should you reach for? It depends entirely on your task, material, and desired outcome. But for most homeowners, a 16–20 oz curved-claw hammer is your golden ticket. Match the tool to the job, respect the physics of force, and never, ever swing blindfolded (true story—I dare you to ask about the garden gnome incident).
Your hammer isn’t just a tool. It’s an extension of your intent. Choose wisely, swing deliberately, and may your nails always go in straight.
Like a Tamagotchi, your DIY skills need daily care… and the right hammer.
Steel meets grain,
Nail sings true in silent wood—
Right tool, no blood.